How to Fix Bone Conduction Headphones Fit With a Helmet [Guides]
![How to Fix Bone Conduction Headphones Fit With a Helmet [Guides]](http://shokz.com/cdn/shop/articles/best-sound-quality-headphones_ece2b4cc-522d-4c85-8cdf-9801876e1294.webp?v=1784602333)
On their own, your bone conduction headphones probably fit perfectly. But the moment you add a helmet or glasses, things can get uncomfortable. The band might feel awkward to wear, pressure can build up behind your ears, and the audio often sounds surprisingly thin.
While some gear combinations are inherently tricky, this doesn't automatically mean your setup is incompatible. Finding a more comfortable fit often comes down to slightly adjusting your layering sequence to maintain proper cheekbone contact.
30-Second Bone Conduction Fit Check
Before adding gear, verify the headphones fit well on their own. The transducers should rest squarely on your cheekbones (not your ear cartilage), with the rear band wrapping around your head without sagging into your neck.
|
Issue |
Likely Cause |
Quick Fix |
Verification |
|
Loose fit |
The band is sitting too low, or pads are angled out. |
Press pads flat against your cheeks. Slide the rear band slightly higher to increase tension. |
Give your head a light shake; the frame typically shouldn't shift. |
|
Thin/uneven audio |
A tiny gap at the contact point, or hair caught underneath. |
Clear hair. Gently nudge pads inward and slightly forward. |
Audio immediately sounds fuller and more present, rather than tinny. |
Why Helmets and Glasses Affect Bone Conduction Headphone Fit
If your headphones fit fine alone but feel awkward once you gear up, it’s usually a simple geometry issue. The headphone band, glasses frames, and helmet straps often compete for the same limited space around your ears. This overlap typically leads to two main problems: localized pressure and audio loss.
Pressure Behind the Ear
When rigid pieces like thick sunglass arms or helmet straps overlap with the headphone band, they can create a pinch point. On longer rides or runs, this stacking can lead to a slowly building pressure.
-
Quick Test: If taking off your glasses noticeably eases the discomfort, you've likely found the conflict zone. The fix is usually reducing overlap by adjusting your layering order, rather than tightening your straps.
The "Lever Effect" on Audio
Gear stacking doesn't just affect comfort; it often makes your music sound unexpectedly thin. If a helmet strap presses down on the rear band, it can act like a lever, slightly lifting the front transducers away from your skin. Even a tiny gap can make podcasts sound distant.
-
Quick Test: While audio is playing, gently press the transducers flat against your cheeks. If the sound naturally gets fuller, the speakers are fine—your other gear is just lifting them out of position.
How to Wear Bone Conduction Headphones with a Helmet
If your headphones feel secure until you strap on your lid, the helmet is likely just nudging the contact points out of alignment. Getting a comfortable fit typically comes down to two things: your layering sequence and your strap routing.
Since different helmet styles—from vented road lids to lower-profile climbing shells—interact with the headphone band differently, here is a quick guide to fixing the most common overlaps:
|
What's Happening |
How to Fix It |
|
Helmet pushes the pads forward off your cheeks |
You're likely putting the helmet on too early. Put the headphones on first. Hold the pads gently against your cheeks while lowering the helmet, then clip the strap. |
|
Chin strap pulls the band down when moving |
The band is probably caught under the strap anchors. Loosen the chin strap, route the rear headphone band above the anchor area, and retighten. |
|
Vented road helmet causes uneven pressure |
The rear band might be resting awkwardly across raised vent structures. Try shifting the band slightly so it rests cleanly between the open channels. |
|
Climbing/skate helmet pins the rear band |
These helmets naturally sit lower on the skull. Try angling the rear headphone band slightly higher up the back of your head to clear the hard rim. |
How to Wear Bone Conduction Headphones with Glasses
Throwing prescription frames or sunglasses into the mix often complicates the fit. What starts as a slight pinch behind the ear can easily turn into a real headache a few miles down the trail. While some people can stack their gear for hours without an issue, others start feeling the pressure within 20 minutes. Typically, the difference comes down to two things: frame thickness and your layering sequence.
Here is how to resolve the most common conflicts between your frames and your audio:
|
What's Happening |
How to Fix It |
|
Pinching pressure behind the ear |
You likely have the headphones tucked under the glasses. Try putting your glasses on first, then gently rest the headphone band over the arms. |
|
Frames push the pads off your cheekbones |
The glasses arms are nudging the headphones outward, making the audio sound thin. Slide each transducer 3–5 mm forward toward your temples to restore contact. |
|
Thick everyday frames cause constant slipping |
Chunky, curved frames crowd your ears and push the headset outward. Switching to thin wireframes or sport glasses with straight, flat arms frees up space. If using retainers, swap bulky cords for flat silicone sleeves. |
|
Sport shades fit worse than daily glasses |
Sport frames usually have wider, thicker temples. Layer the headphones over the shades and slightly tilt the rear band up or down until the pressure evens out. |
How to Wear Bone Conduction Headphones with Both a Helmet and Glasses
If your setup only falls apart when you combine all three pieces of gear, you're dealing with the ultimate stacking challenge. When you have a helmet, glasses, and a headphone band all competing for the same few millimeters behind your ear, throwing them on in a random order usually leads to frustration.
The Optimal Layering Sequence
Getting this right from the start prevents unnecessary shifting later. For the best chance at a comfortable, stable fit, try this sequence:
-
Glasses First: Get your frames seated exactly where you like them.
-
Headphones Second: Rest the band gently over the glasses arms, and settle the transducer pads on your cheekbones.
-
Helmet Last: Lower the shell carefully straight down over your setup, ensuring the straps drop cleanly without dragging the headphone band forward.
If you can gear up without having to redo the process two or three times, this sequence is working for you.
Dealing with Mid-Ride Pressure
A common frustration on longer sessions is that everything feels fine in the driveway, but an hour in, a nasty pinch develops. This usually means one layer is slowly migrating. Instead of suffering through it, pause after the first few miles. Check if your glasses have slid under the band, or if the helmet has settled lower. Often, loosening your helmet dial by just half a click and re-seating the headphones is enough to stop the pressure from building.
Matching the Fit to the Activity
Keep in mind that different sports create different pressure patterns.
-
Road Cycling: Pay extra attention to how the chin strap routes past your ears and where the band sits against the helmet vents.
-
Trail Riding: Factor in the added bulk of goggle straps and heavier rear-retention dials bouncing on rough terrain.
-
Climbing: Since climbing shells typically sit lower on the skull, you'll often need to angle the rear headphone band slightly higher to clear the hard rim.
Fine-Tuning Your Bone Conduction Headphones for a Better Fit
Even with the perfect layering sequence, the hardware itself might still need a minor physical adjustment to sit comfortably.
-
Elevate a Sagging Band: A rear band resting low on your neck loses its natural anchoring tension. Simply tilt it upward to sit lightly along your occipital ridge (the bony bump on the back of your skull) while keeping the front pads level.
-
Balance Uneven Contact: A secure fit on one side and a loose wobble on the other usually points to trapped hair or natural head-shape asymmetries. Clear any hair away, nudge the band slightly toward the loose side, and (where the frame allows) give it a gentle inward flex.
-
Relieve Hot Spots: Extended wear can occasionally cause a dull ache if the pads rest on one exact spot for too long. Sliding the transducers forward or backward by just 2–3 mm can help redistribute the pressure, usually providing relief without noticeably impacting your audio quality.
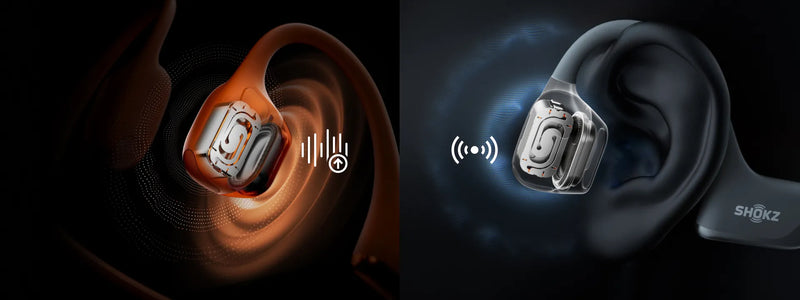
If manual adjustments still leave you with pressure, upgrading your hardware can help. The Shokz OpenRun Pro 2 uses DualPitch™ technology to route heavy bass through air conduction, significantly reducing harsh bone vibrations and the physical squeeze typical of traditional designs.

Securing Bone Conduction Headphones During Intense Activities
Sometimes, standard repositioning isn't enough to combat the heavy bouncing of a technical trail run or a rough mountain bike descent. When high movement is the issue, you can use a few practical, real-world workarounds to keep your setup stable.
-
The Sweatband Method: Instead of adding extra bulk behind your ear, try wearing a thin fabric sweatband over the top of your ears and the headphone frame. This gently pins the transducers against your cheeks and absorbs bounce without creating new pressure points with your glasses or helmet.
-
Use a Rear Tension Band: If you have a smaller head or just need extra grip for rough terrain, check your headphone box. Many brands include a small silicone tension band that attaches to the rear frame, slightly pulling the pads tighter against your face to minimize bouncing.
-
Swap Out Helmet Padding: Thick interior helmet pads can compress mid-ride, slowly pushing the headphone band out of place. If your helmet allows it, swapping to thinner, low-profile pads around the ear clearance area can often solve this migration issue.
-
The Tape Hack for Heavy Vibration: For relentless jostling on rugged trails, some hardcore athletes apply a tiny strip of medical-grade skin tape to the outer edge of the transducer to lock it down. Just make sure you don't cover the main contact patch, which can muffle the sound.
Verifying Bone Conduction Headphone Fit (and When to Get Help)
After tweaking your setup, you can use sound and physical feel as your final diagnostic. However, if the issue persists across multiple sessions, it's important to recognize when to stop adjusting and look at the hardware itself.
-
The Audio and Tap Tests: Play a familiar track; a solid fit should sound full and direct, not distant or tinny. Next, gently tap the outside of each transducer. If you clearly feel the vibration transferring into your cheekbone, your contact is good.
-
The 10-Minute Recheck: Gear naturally settles as you sweat and move. Make it a habit to pause 10 minutes into your workout to re-seat the pads and confirm the initial fit is holding.
-
Check for Band Stretch: If your headphones still slip after tweaking the fit, the frame may have lost its natural tension. Bands can slightly widen over time; if yours looks looser than when new, it’s likely just normal wear and tear.
-
Skip the Support Script: Some helmets or thick frames simply don't pair well with certain headsets. When contacting support, detail your exact headphone model, your specific gear, and the fixes you’ve already tried to help reps bypass the basic troubleshooting script and fast-track a solution.