Shokz OpenSwim Pro MP3 Storage: How to Transfer, Manage, and Organize Files

If you want to set up OpenSwim Pro MP3 Storage, the process is straightforward. Connect the headset to your computer with the included magnetic cable, then copy supported audio files to the SWIM PRO drive.
The process is simple, but a few details can affect the transfer, including the cable connection, file format, and how the device appears on your computer.
Here’s how to get it right.
What You Need Before Using Shokz OpenSwim Pro MP3 Storage
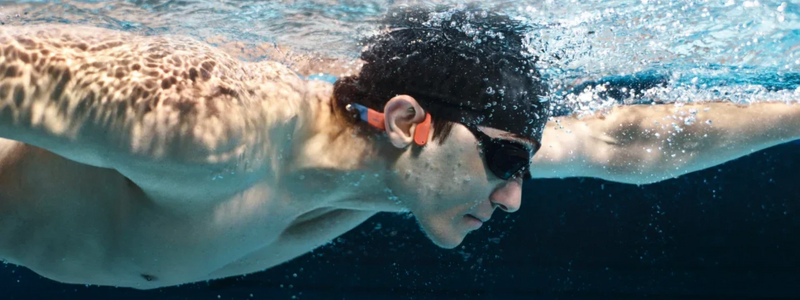
Why do underwater swimming headphones need built-in storage? Bluetooth connections aren’t designed for reliable audio playback underwater, so local storage lets the OpenSwim Pro play music directly from the headset while you swim. Before transferring your music, here’s what to know about its storage capacity, supported formats, and computer connection.
32GB of storage, built for offline listening
The OpenSwim Pro includes 32GB of MP3 storage, enough for approximately 8,000 songs depending on file size.
That storage is designed for local playback. In MP3 mode, the OpenSwim Pro is rated for about 6 hours of playback on a full charge, so you can keep music stored on the headset for swim sessions without relying on a phone connection.
Supported file formats in MP3 mode
The OpenSwim Pro supports a wide range of audio formats in MP3 mode:
MP3, FLAC, WAV, AAC, M4A, APE, and WMA
If your audio files are already in one of these formats, you can generally transfer them directly to the OpenSwim Pro without converting them first.
Check your files before you copy
Before loading anything, check the file extension. On Windows, you can see it in File Explorer. On Mac, you can confirm it in Finder file information.
If a file uses one of the supported formats, you can try transferring it directly. If a file does not transfer or play as expected, converting that individual file to a supported format such as MP3 is a practical option. You can then transfer the converted file and try playback again.
No special transfer software required
You can transfer music to the OpenSwim Pro directly from your computer using the included magnetic cable.
On Windows, the computer should recognize the headset as storage and show the SWIM PRO drive in File Explorer. On Mac, it should appear as a mounted drive in Finder. If it doesn’t appear right away, reconnect the cable and check whether external disks are enabled in Finder settings.
You don’t need separate software just to copy music files to the device.
How to Connect the OpenSwim Pro to Your Computer
Use the included magnetic cable — and only that cable
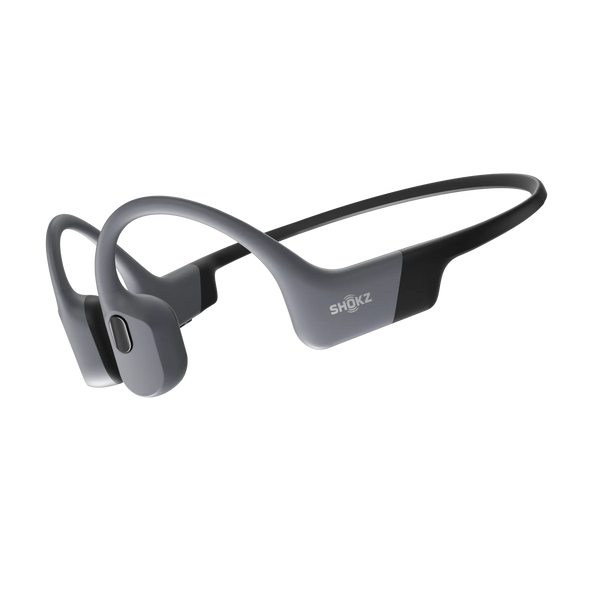
To access OpenSwim Pro MP3 Storage, use the included magnetic induction charging cable to connect the headset to your computer.
Align the magnetic connector with the charging contacts and make sure it sits securely. A poor connection can prevent the computer from recognizing the device.
How the OpenSwim Pro Appears on Your Computer
On Windows, the OpenSwim Pro should appear in File Explorer as the SWIM PRO drive. On Mac, it should appear in Finder as a mounted drive. Once you see the drive, you can open it and copy supported audio files directly to the device.
If it doesn’t appear, reconnect the magnetic cable. On Mac, also check Finder settings to make sure external disks are allowed to appear in the sidebar or on the desktop.
Switch to MP3 mode for local playback
MP3 mode is used for playing music stored locally on the OpenSwim Pro.
You can transfer files through your computer using the magnetic cable, then switch to MP3 mode when you want to listen to the music stored on the headset.
Keeping those two steps separate makes the process easier to understand: the computer handles the file transfer, while MP3 mode handles local music playback.
How to Transfer Files to Shokz OpenSwim Pro MP3 Storage
Drag-and-drop transfer, step by step
Moving music onto the OpenSwim Pro is a direct process.
-
Connect the OpenSwim Pro to your computer using the included magnetic cable. The device should appear as the SWIM PRO drive in File Explorer or Finder.
-
Open the SWIM PRO drive. You can browse the storage and existing folders before adding new files.
-
Locate the supported audio files you want to copy. These may be stored in different folders on your computer.
-
Drag the selected files into the OpenSwim Pro drive. A transfer progress indicator should appear.
-
Wait for the copy to finish before disconnecting the headset.
Once the transfer is complete, safely eject the device before removing the cable.
Transferring files from your computer’s music library
If your music library contains AAC, M4A, FLAC, or other supported files, check the file format before transferring.
Supported files can generally be copied directly to the OpenSwim Pro. If a particular file does not play after transfer, check its format and try converting that file to another supported format such as MP3 before transferring it again.
There’s no need to convert your entire library just because one file has a problem.
Converting unsupported files before transfer
If a file uses an unsupported format, convert it before copying it to the OpenSwim Pro.
Use a trusted audio converter on your computer and export the file to a supported format such as MP3 or FLAC. For larger libraries, batch conversion can also help keep your files in a consistent format before you transfer them.
Eject safely before unplugging
When the transfer is done, eject the OpenSwim Pro from Finder or File Explorer before disconnecting the cable.
This gives the computer time to finish writing the transferred files. Removing the headset while a transfer is still in progress can cause file or storage problems.
Treat the OpenSwim Pro like other removable storage: let the transfer finish and eject it properly before disconnecting.
How to Organize Shokz OpenSwim Pro MP3 Storage for Better Playback
Playback order isn’t always about filenames
When managing OpenSwim Pro MP3 Storage, playback order may not follow the filename order you see on your computer.
If playback order matters, organizing tracks into folders can make your library easier to navigate. Naming files with numbers such as 01, 02, 03 can also make the intended order easier to see, although it may not determine playback order by itself.
Use folders to separate playlists and workouts
Folders make the OpenSwim Pro easier to navigate.
A practical setup is one folder per use case: warm-up, intervals, long swim, cooldown, or even audiobooks and podcasts. Instead of keeping everything in one large collection, you can group files based on how you plan to use them.
Skip between folders in MP3 mode
After the relevant firmware update, you can skip folders by holding Volume+ or Volume- for about 2 seconds in MP3 mode. Continue holding the button until you hear the relevant prompt or tone indicating the folder change.
Once your music is organized into folders, this gives you a quicker way to move between different groups of files.
What the Shokz app can — and can’t — do
The Shokz app can help you manage supported device settings and control playback-related functions, making it useful when checking or managing your listening experience.
Music files themselves are transferred through a computer using the included magnetic cable. The app does not replace that file-transfer process.
In short, use the app for device and playback-related controls, and use your computer to move music files onto the OpenSwim Pro.
How to Delete Files and Free Up Space
Delete individual files directly from the drive
To remove tracks from OpenSwim Pro MP3 Storage, connect the headset to your computer, open the SWIM PRO drive in Finder or File Explorer, and delete the files you no longer want.
After the files are deleted, the space they occupied becomes available for new music. This is a simple way to update your library without changing the rest of your stored files.
Clear all music without formatting the device
If you want to start over, delete the music files and folders you no longer need from the mounted drive.
Avoid formatting the OpenSwim Pro through your computer’s disk-management tools. Instead, manage the music files directly on the SWIM PRO drive. If you’re unsure which files or folders can be removed, leave device-related files and folders in place.
Troubleshooting Shokz OpenSwim Pro MP3 Storage
OpenSwim Pro not recognized by your computer
If the headset doesn’t appear after connecting, start with the basics.
-
Check that the magnetic cable is properly aligned and seated.
-
Try a different USB port on your computer.
-
Look for the SWIM PRO drive in File Explorer or Finder.
-
On Mac, check Finder settings to make sure external disks can appear.
-
Reconnect the headset and give the computer a moment to detect it.
If the drive still doesn’t appear, checking the cable connection and trying another computer can help narrow down the issue.
Files transferred but won’t play
If files copied successfully but won’t play back, check the format first. The supported formats are:
MP3, FLAC, WAV, AAC, M4A, APE, and WMA
If the file uses a supported format and playback still doesn’t work, safely eject the device, reconnect it, and transfer the file again. If the issue affects only one file, try converting that file to another supported format such as MP3 and then copy it to the device again.
Storage shows full, but songs seem to be missing
If OpenSwim Pro MP3 Storage appears full while some tracks seem to be missing, first check the SWIM PRO drive for files and folders you may have overlooked.
You can also review the folders on the drive and remove music files you no longer need. Avoid deleting files or folders unless you recognize them as music or files you added yourself.
If the available storage still doesn’t look right after cleaning up your music, reconnect the device and check the drive again.
Can you load music without a computer?
The OpenSwim Pro stores music locally, and music files are transferred through a computer using the included magnetic cable.
Once the files are on the device, you can listen to them in MP3 mode without streaming from a phone.
For swimming, that local playback setup lets you keep your music stored on the headset and listen without relying on a phone connection.
The Simple Way to Manage Shokz OpenSwim Pro MP3 Storage
At its simplest, OpenSwim Pro MP3 Storage comes down to a few steps: connect the headset with the included magnetic cable, open the SWIM PRO drive, copy supported audio files, organize them into folders, and safely eject the device when you’re finished.
Once your library is set up, you can switch to MP3 mode and play music stored directly on the OpenSwim Pro.
Keep the files organized, check formats when something doesn’t play, and use the computer for file transfers. That’s all you need to keep your local music library ready for your next swim with Shokz open ear headphones.